
Stations
Set up a station
Choose kiosk capabilities, register the device, and verify the screen with support.
A station needs a template defining what it can do and a registration identifying the device. Arrange device setup with support, then manage its behavior through Admin → Stations.
Step 1: Create a template
Open the Templates tab and select Add Template. Enter a name, description, and station type.
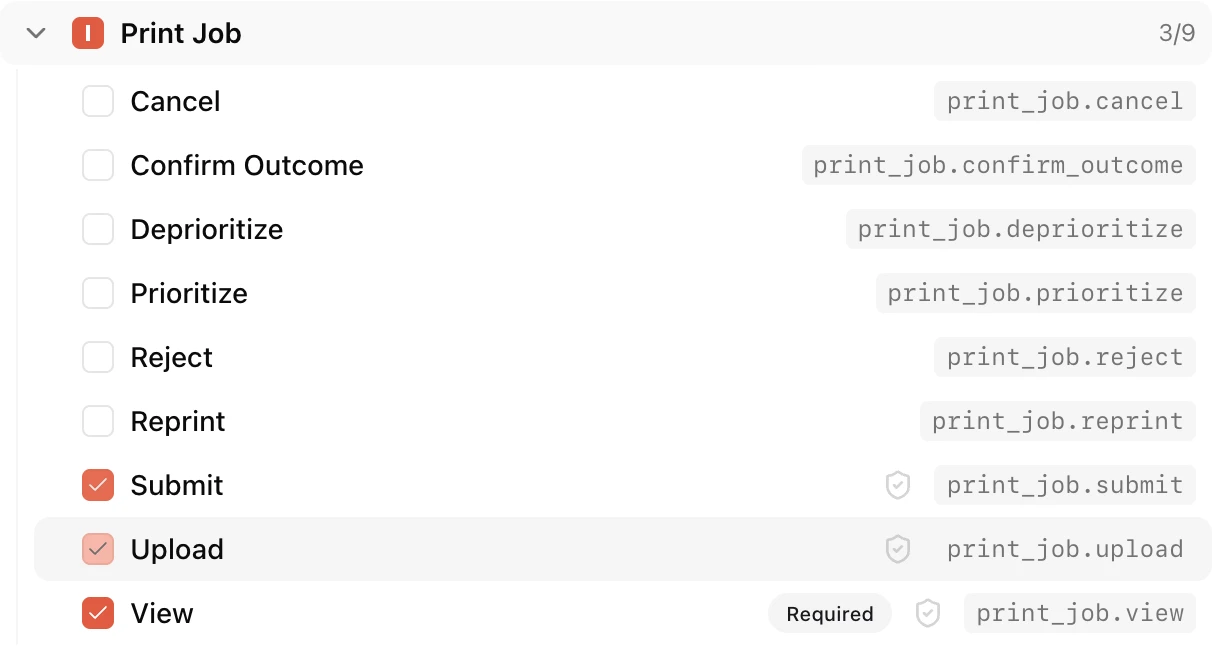
Choose only the capabilities that screen needs. Required capabilities are selected automatically; unavailable capabilities cannot be selected. Use the identification toggle beside an action to require a person to identify themselves before using it.
For example, a management kiosk can allow anyone to view printers while requiring identification to approve jobs or stop a print. Display boards only show information.
Step 2: Register the device
On the Stations tab, select Add Station and fill in:
| Field | What to choose |
|---|---|
| Name | A location staff recognize, such as Front Desk Tablet. |
| Identified by | The method agreed with support: IP address or client certificate. |
| IP Address / Client certificate | The device identity confirmed during setup. |
| Template | The template defining the screen and its actions. |
| Site | The location whose pickup bins this station serves. |
| Enabled | Keep enabled while the device should have access. |
Setting the site
For pickup, the site determines which bins and prints the station can reach. A pickup station without a site has an empty collection board and cannot start a bin check. A bin can serve several sites.
The site’s setting does not narrow the management station’s printer grid, queue, approvals, or history. Those cover the organization.
Registering a station by IP address
Use the address confirmed with support or your IT team. If it changes, the device may appear unregistered. Ask IT to keep its address stable.
Registering a station by client certificate
Support and your IT team arrange certificate setup on the device. If Client certificate is unavailable in the form, contact support to enable it. Enter the certificate or fingerprint they provide.
Coordinate certificate renewal before expiry. Replacing a certificate also requires updating the station registration.
Step 3: Open and verify the kiosk
Open your portal’s /station/ address on the registered device. An enabled, recognized device loads its assigned screen without a separate device sign-in.
Check the tabs and permitted actions, then test identification with a staff member. For pickup, confirm the expected bins appear.
If the screen says it is not registered, check that the station is enabled and that its displayed identity matches the registration. Contact support if they differ or a certificate is missing.
Card readers
If you need card identification, ask support to arrange a compatible reader and Pluraprint Desktop setup. Once configured, test a card assigned to a known user before opening the kiosk to visitors. PIN and phone identification options depend on your organization’s setup.
Later changes
Editing a template updates every station using it. Station changes also reach open screens automatically. Tell staff before removing an action they rely on.
To retire a device, disable its station registration. To delete a template, first reassign the stations that use it.